At this end of time it’s become difficult to discern with any certainty when bakers in Aberdeen started making this signature roll. Various stories suggest that it was initially devised for fishermen sailing from Aberdeen port as a bread with superior keeping qualities due to its lard content. What probably also makes a difference in the rowie’s keeping quality is the multilayered, croissant-like structure. It’s harder for such a bread roll to go stale straight through in a short time (though unquestionably its texture does change after a day or two). The addition of lard to the butter used in the layering makes for a more robust flavor and a very tender crispness, when freshly baked, that’s frankly entirely too easy to get hooked on.
Rowies became a local favorite of Aberdeen working people whose preferred breakfast was porridge with milk, and then a cup of tea and a rowie. When World War I rolled around, though, this favorite breakfast was sporadically imperilled when the “Food Controller” chose to regard rowies as a bread, and therefore subject to new laws making it illegal to sell newly baked bread unless it had been out of the baker’s oven for at least twelve hours. The purpose of this law was to prevent people eating more bread than necessary due to the fact that extremely-fresh bread is harder to slice thinly. The Aberdeen bakers (correctly!) protested that rowies were designed to be eaten as soon as possible after baking, and (since they weren’t anything like as good after twelve hours) should be exempt from the law. For a few months they were exempted… but then (possibly after bakers further south complained) they were banned. Various Aberdeen bakers appealed this ruling several times, and some were actually fined for baking and selling illicit Rowies. Not until 1919 was it possible to sell rowies again without fear of running into some inconvenient legislation.
For home bakers the main challenge in making rowies is the time and patience required in rolling and folding the dough and chilling it between the roll-and-fold operations. But the result is a very lovely (and quite rich!) breakfast roll. These freeze well, so an afternoon’s labor can be made to last a long while. The rowies crisp up well in the oven in a very short time, and are terrific with a good fruit jam or marmalade.
The recipe we’re using here is adapted from Jane Grigson’s classic UK-regional cookbook The Observer Guide to British Cookery. Grigson warns (correctly) that you have to be careful about the softness of the combined fats when you’re working: if they’re too hard they’ll tear the dough: if they’re too soft, they’ll be squeezed out of the layers of dough during the rolling-and-folding process.
The ingredients:
Directions:
Combine the bread flour, yeast, and salt in a bowl (or the mixing bowl of a stand mixer with a yeast hook if you have one). Add the water, mix well until you’ve got a dough, and knead for at least five minutes, whether working by hand or using the dough hook. (We kneaded ours for about six minutes using the dough hook in our Kenwood.)
Find a bowl big enough to hold the dough when doubled, butter it inside, put in the dough and turn it until all its sides are a little butter-coated: then cover with plastic wrap or a reusable cover and allow to rise for at least an hour, or until it’s doubled up.
While waiting for this to happen, in another bowl that gives you room enough to work, mash together the butter and lard with a fork until they’re evenly mixed/creamed together. Divide the contents of the bowl into thirds.
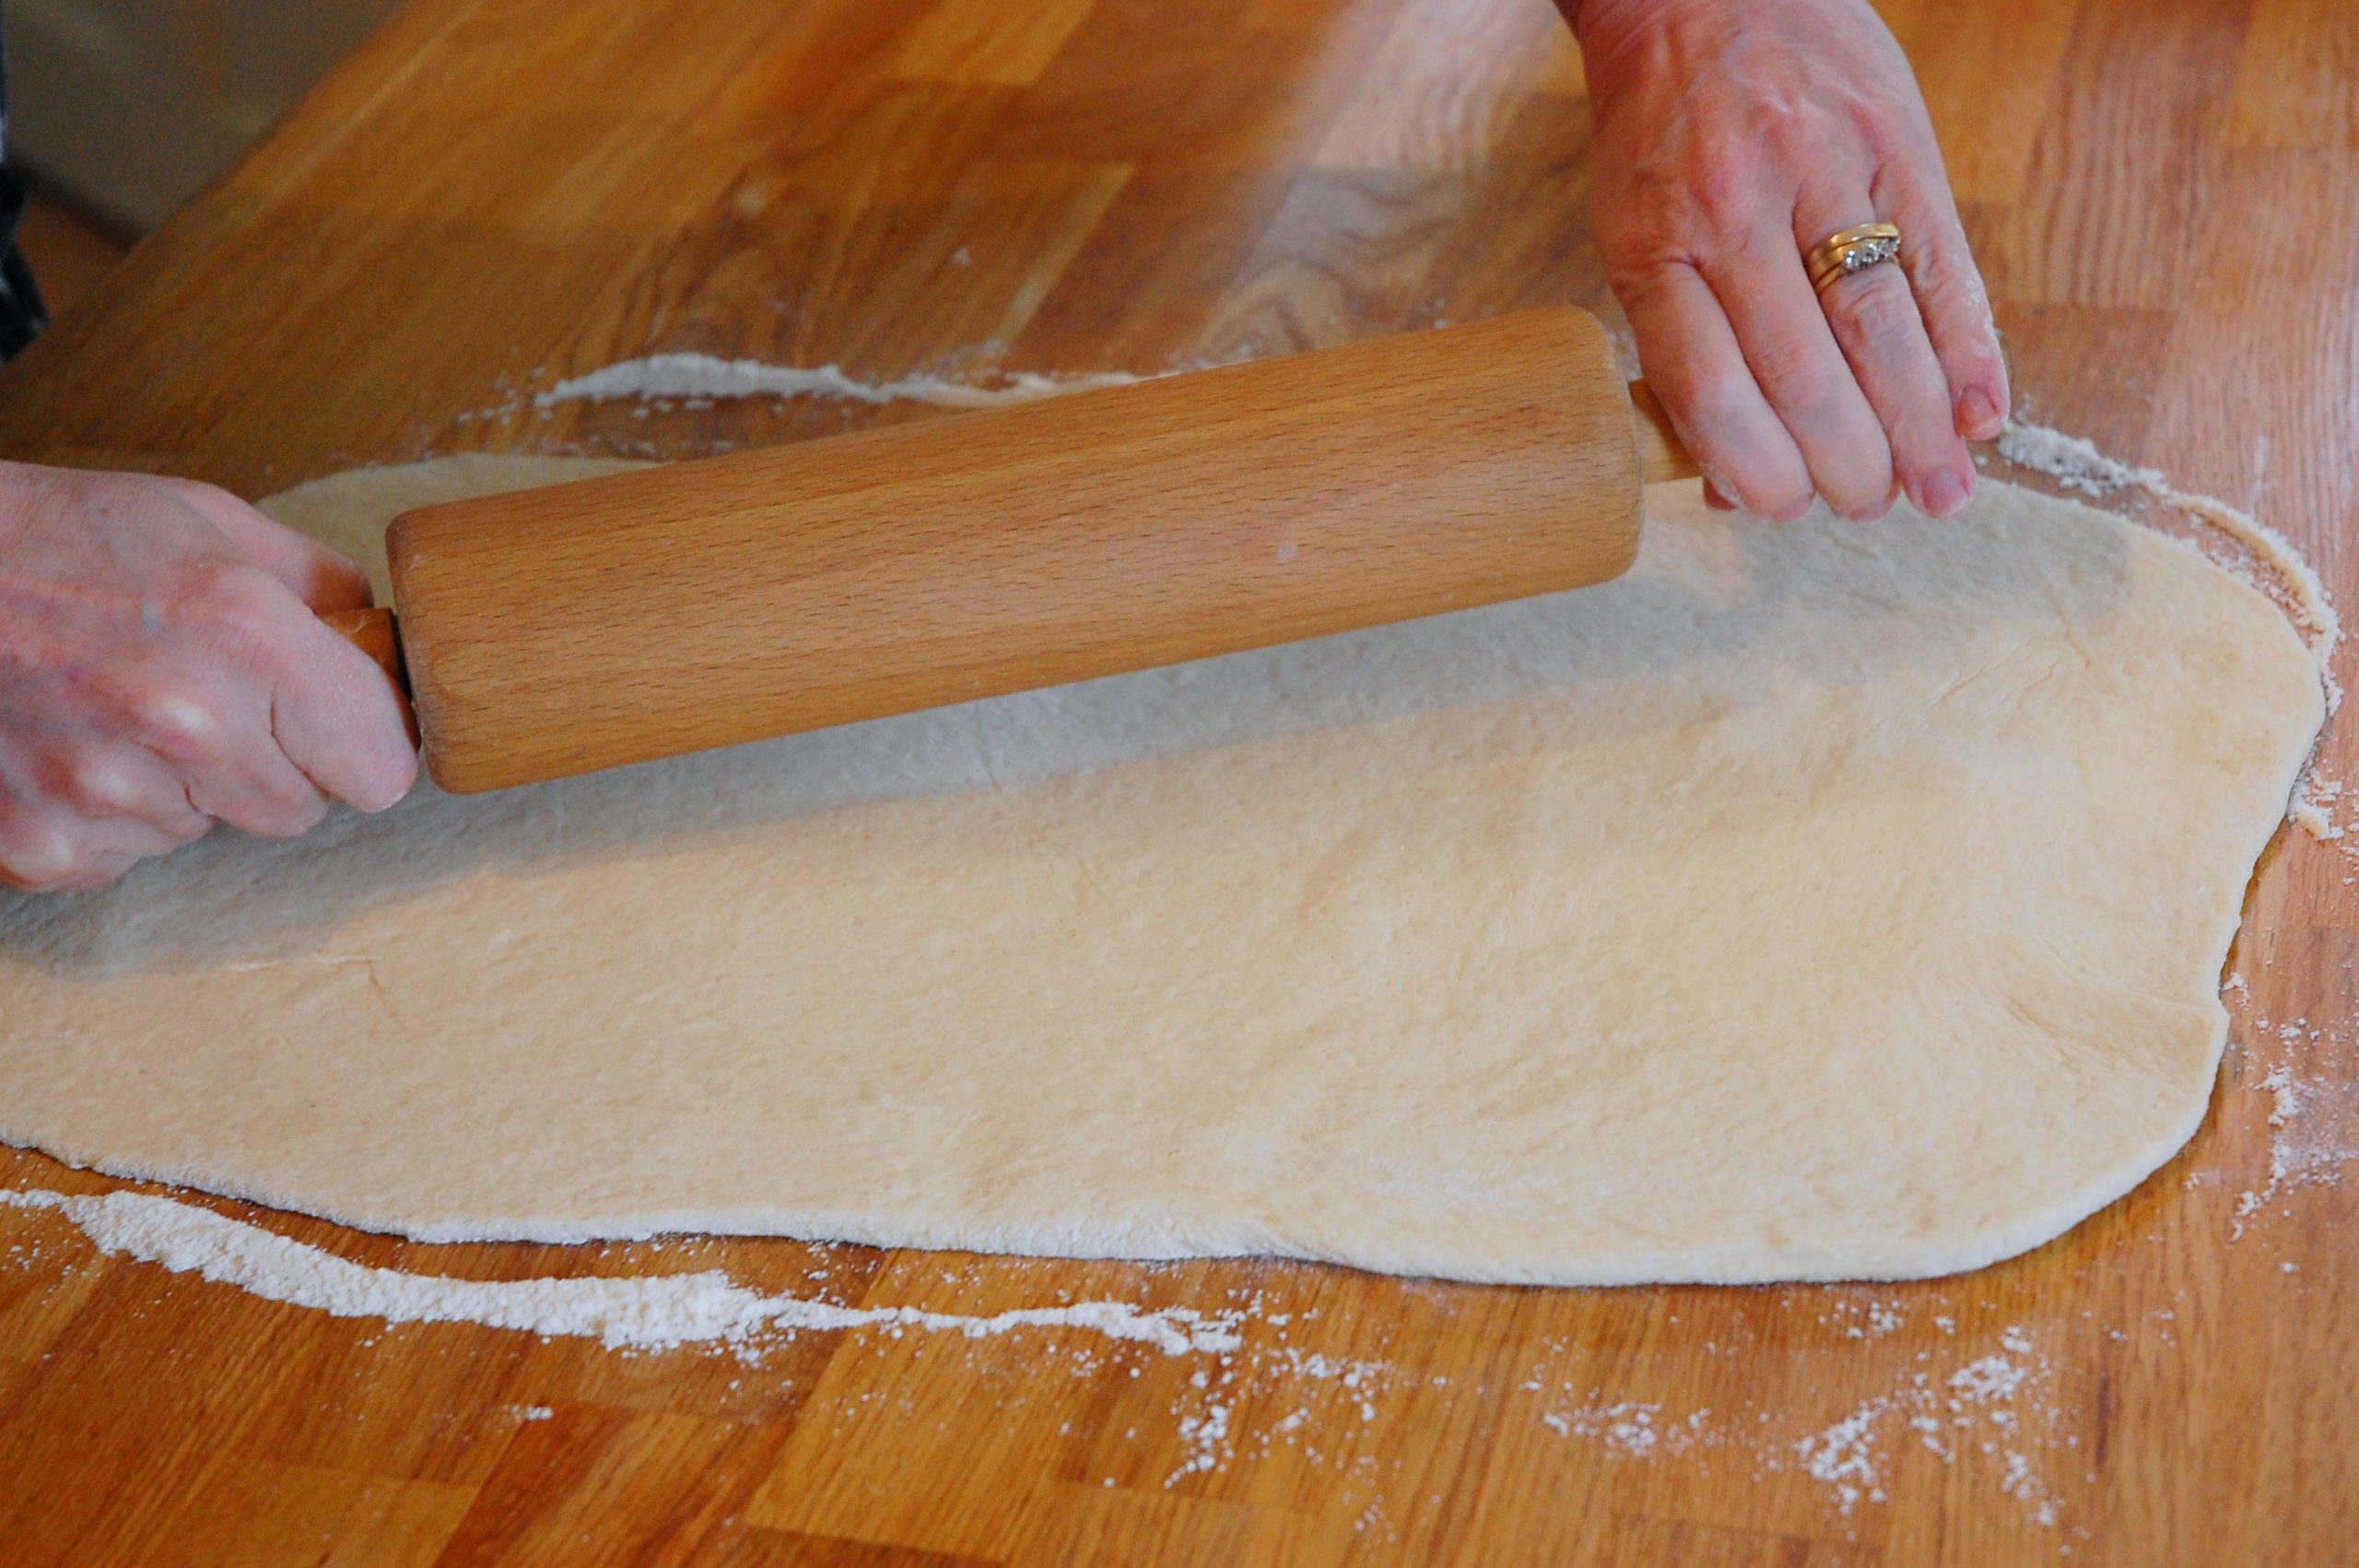
When the dough has doubled, knock it down, lightly flour a work surface, and roll it out fairly thinly (to between 1/4 and 1/2 inch thickness) into a long rectangle.
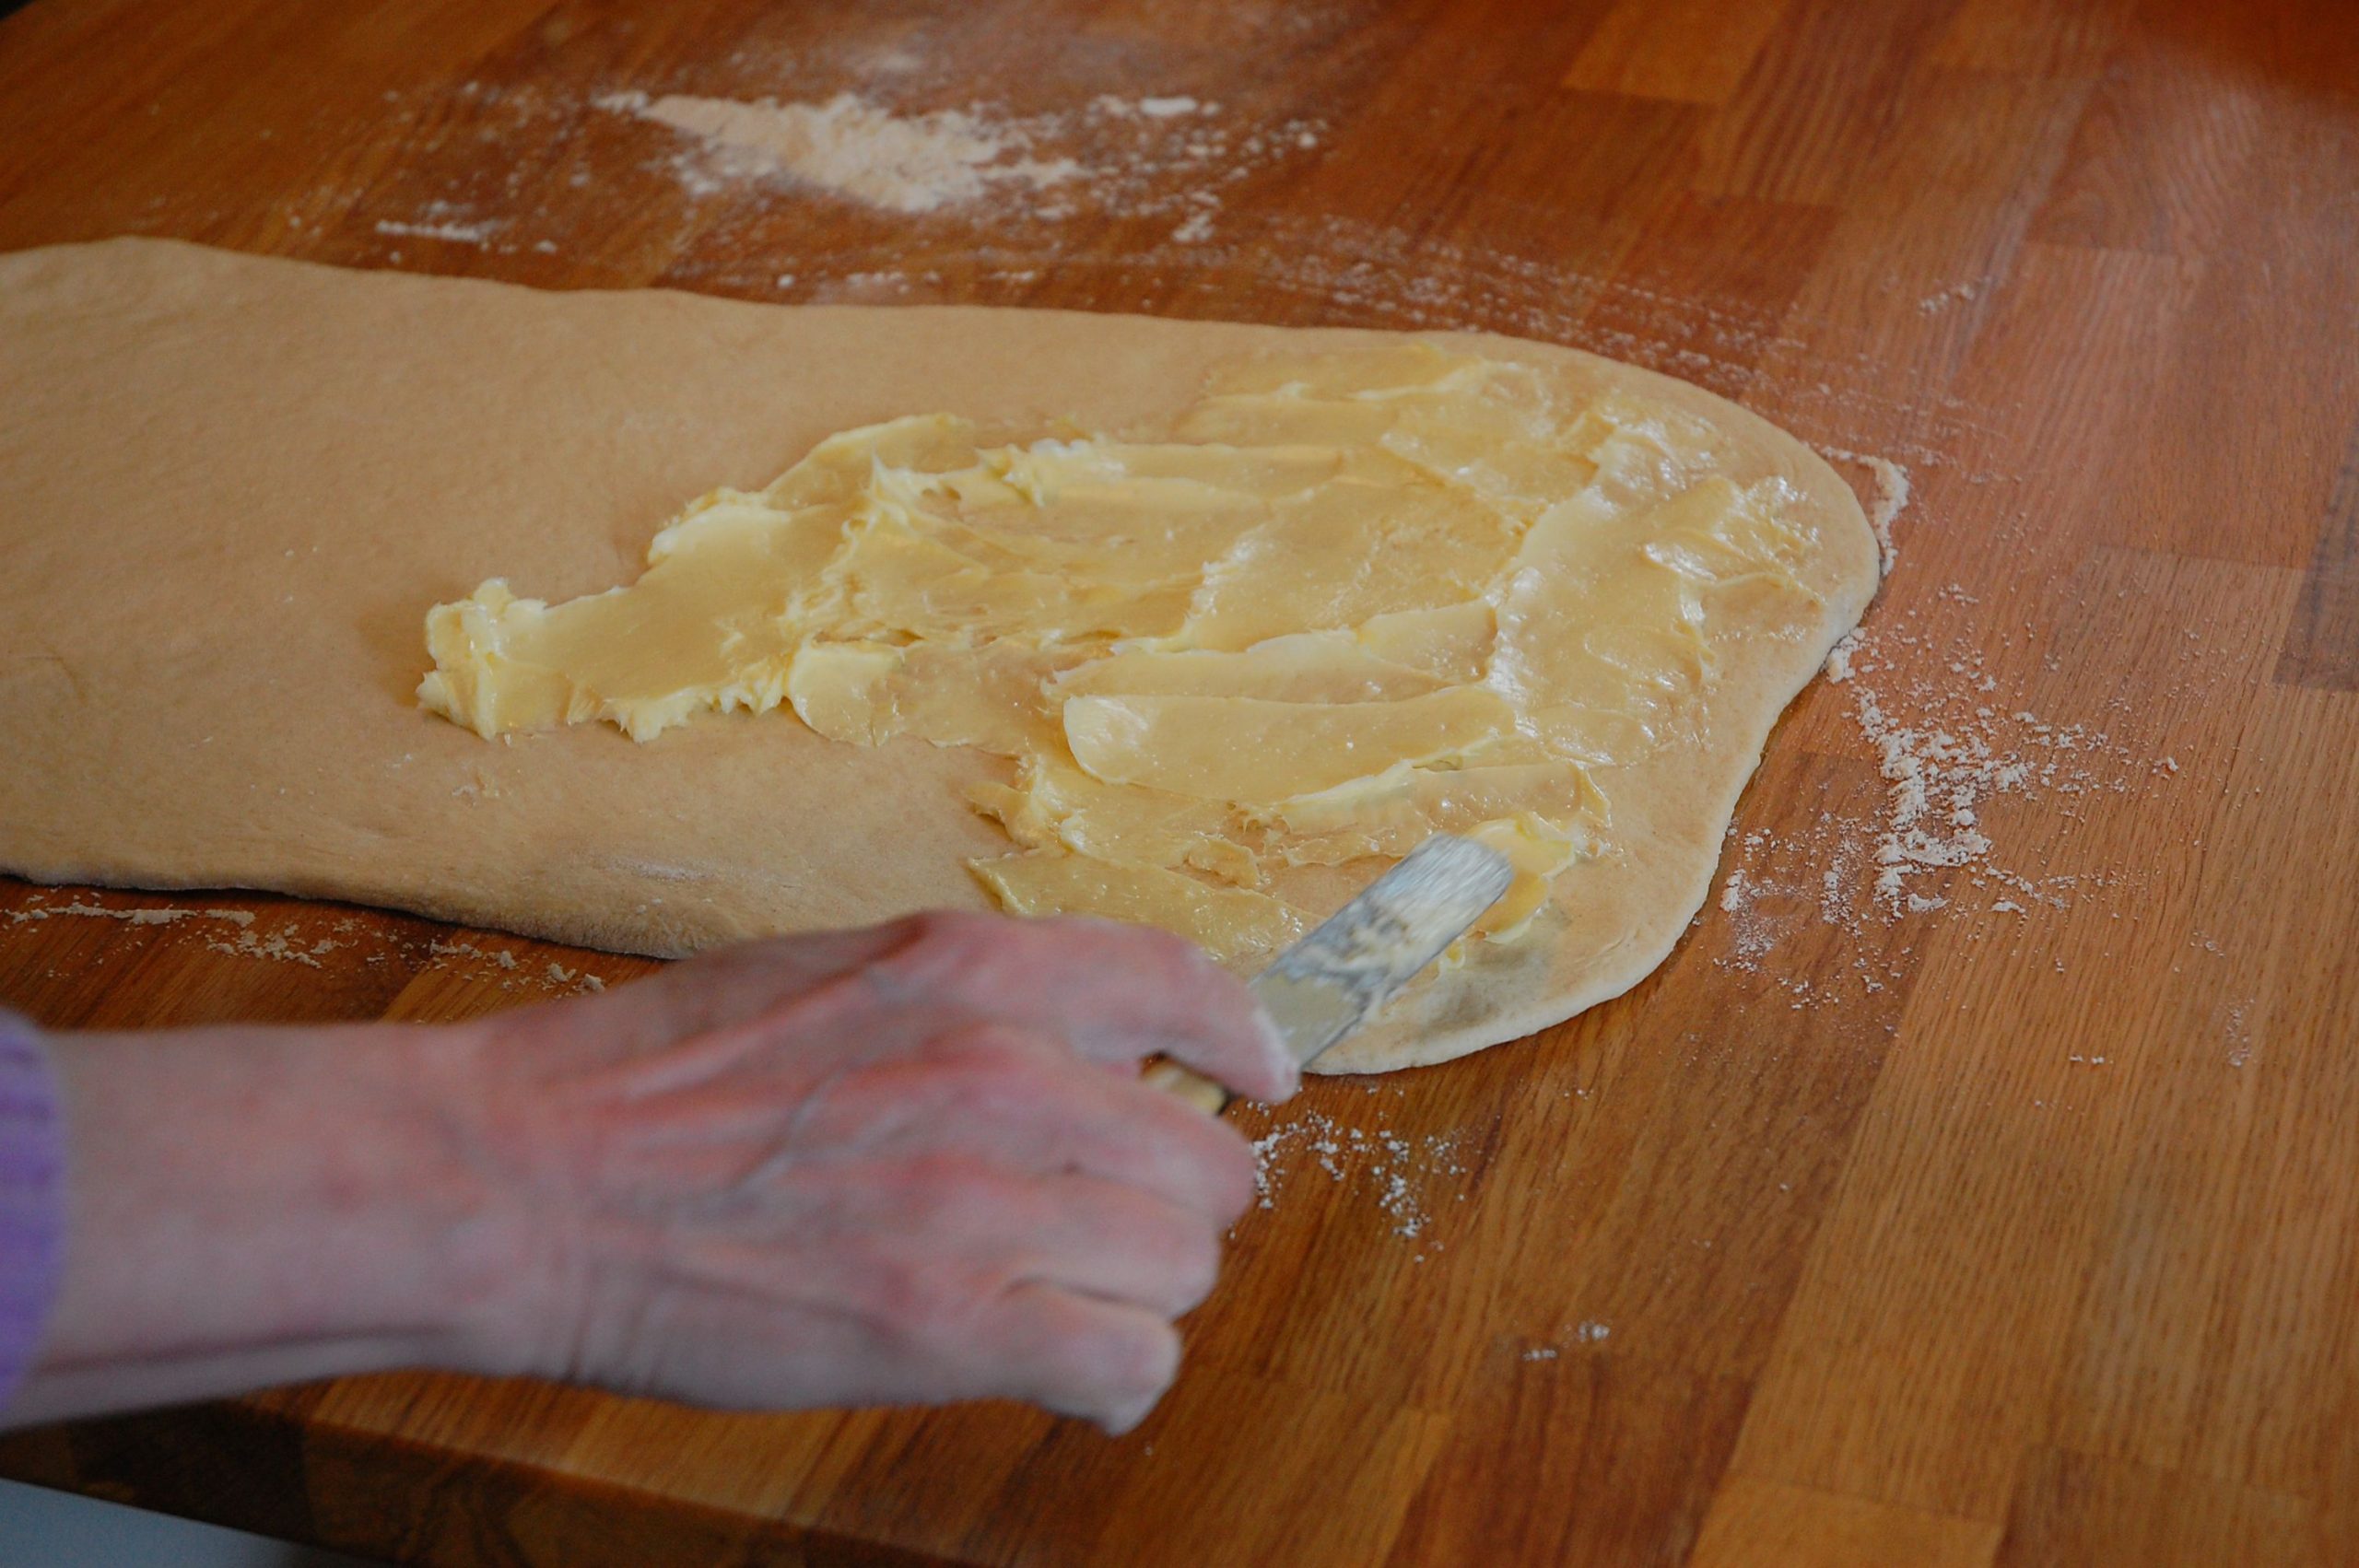
Spread the right-hand two-thirds of the rectangle (if you’re working in “landscape format”) with one third of the butter-and-lard mixture.
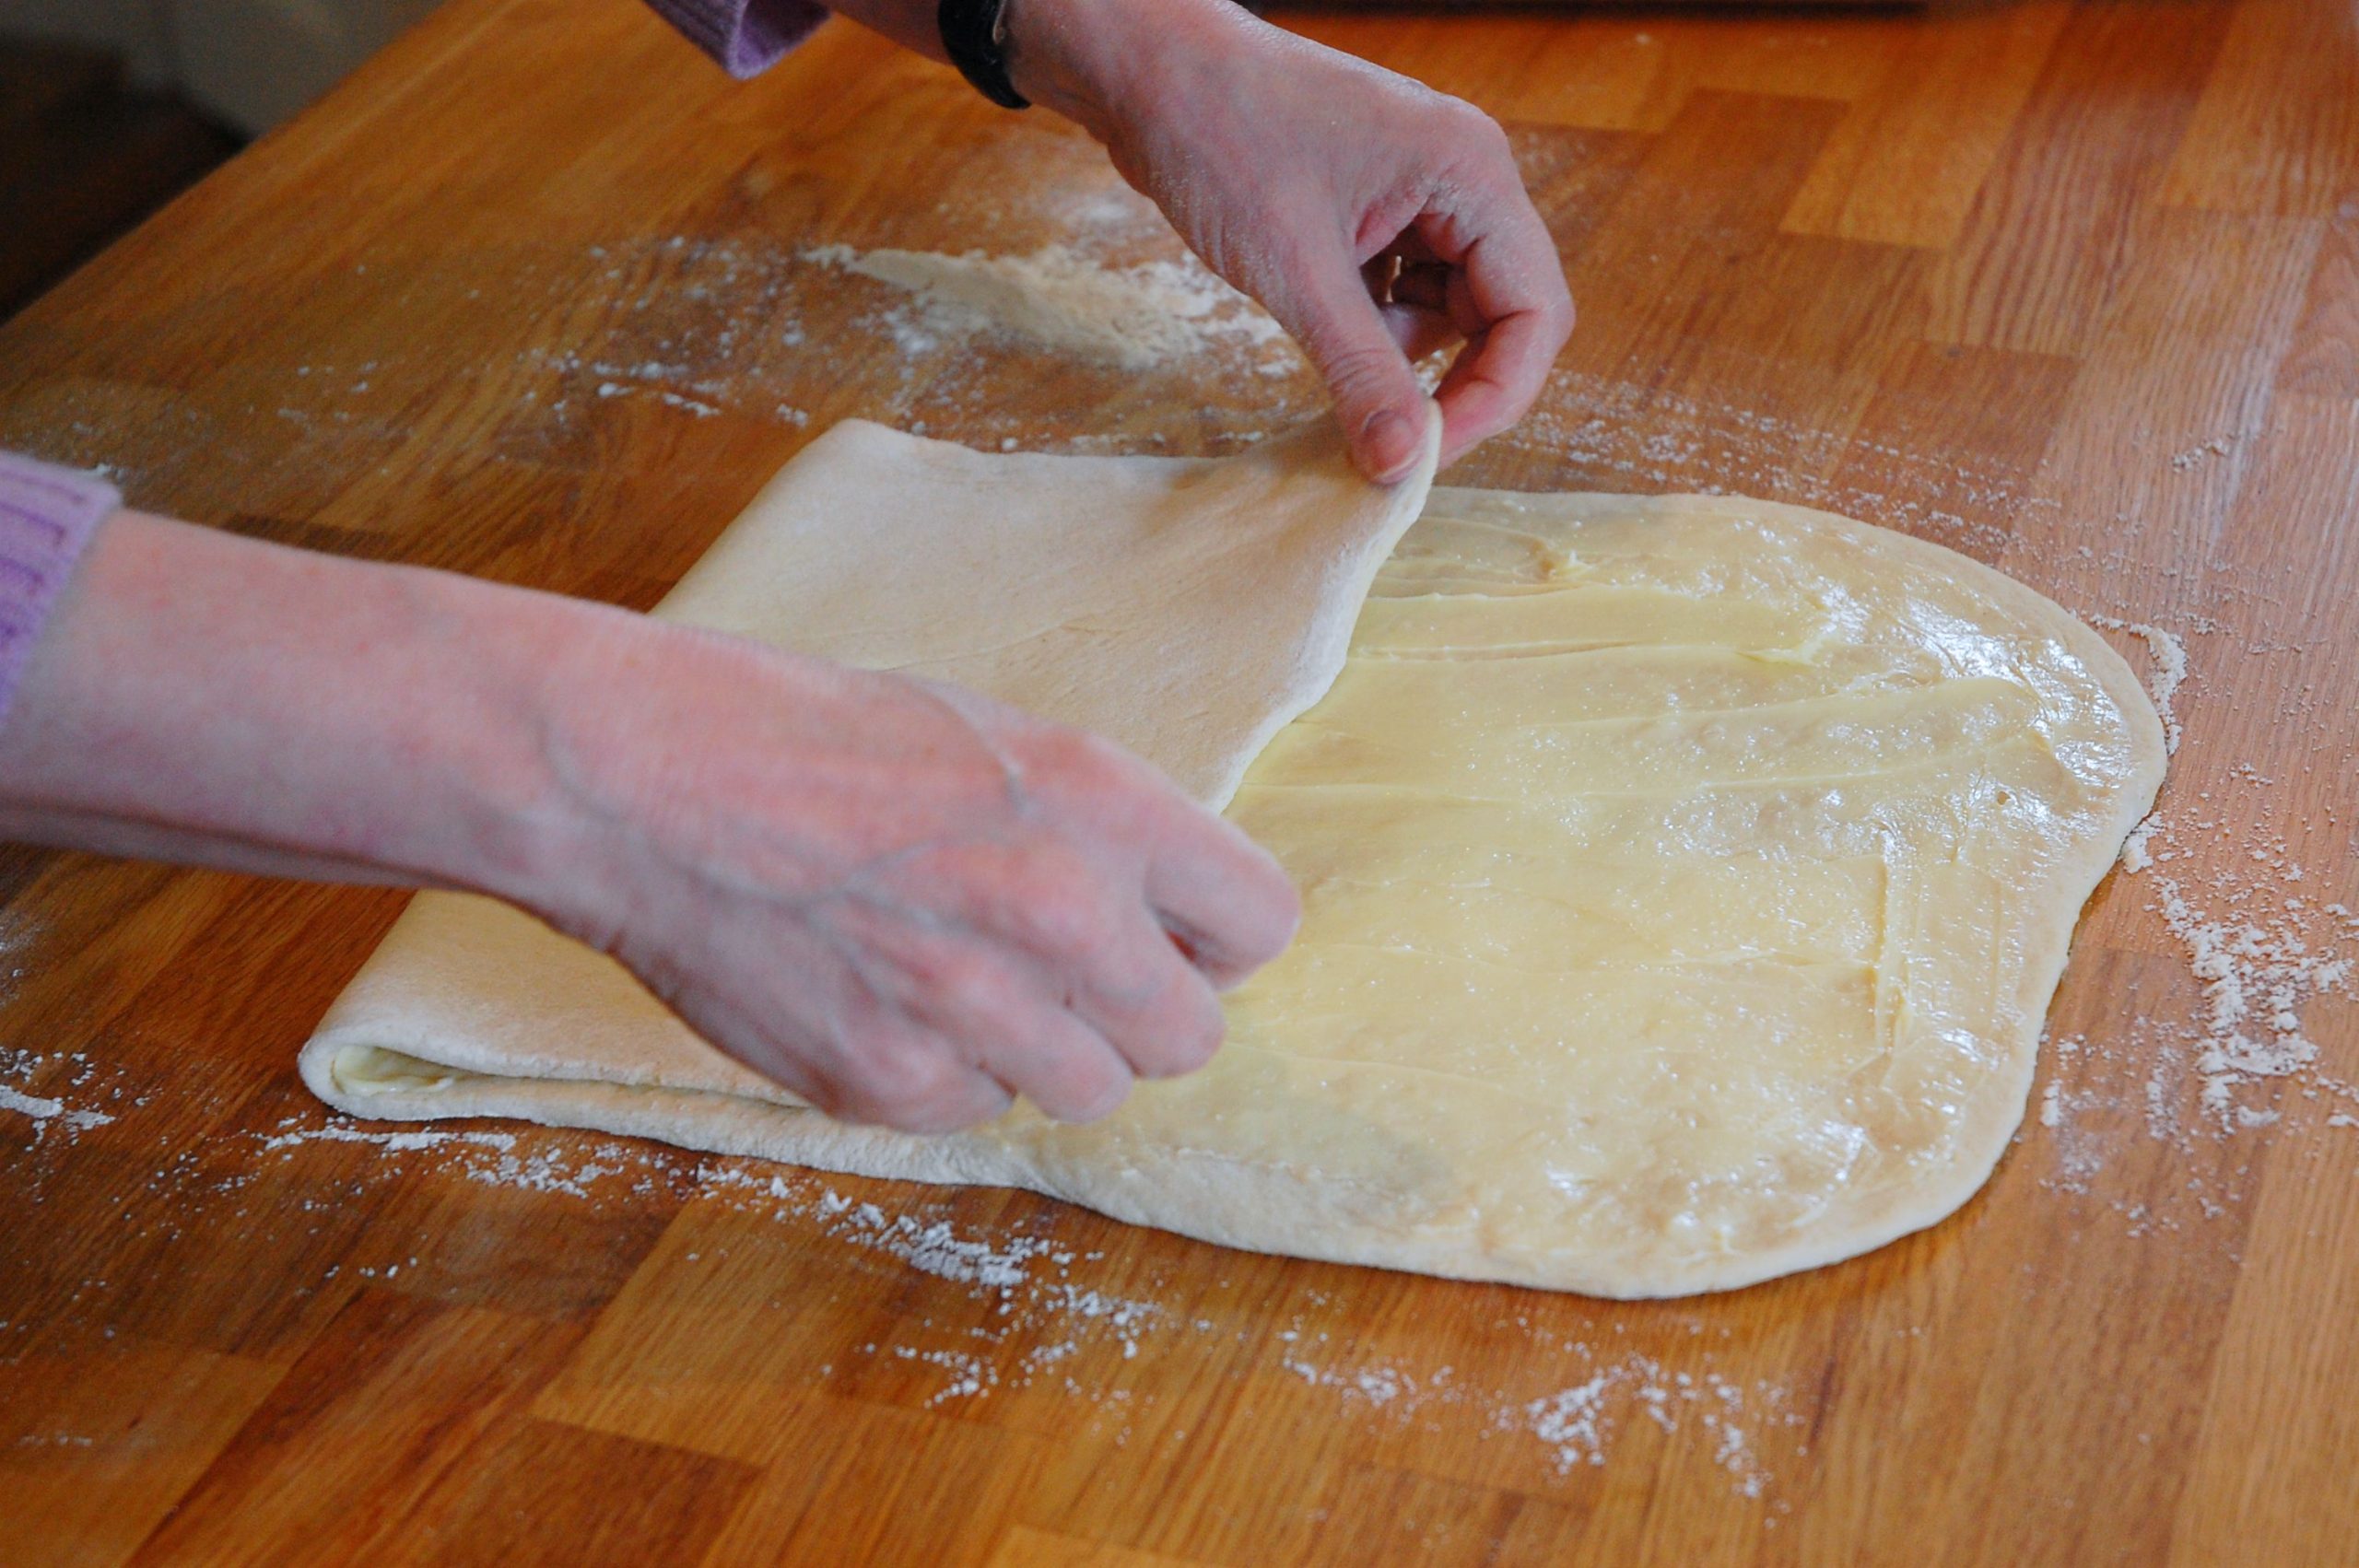
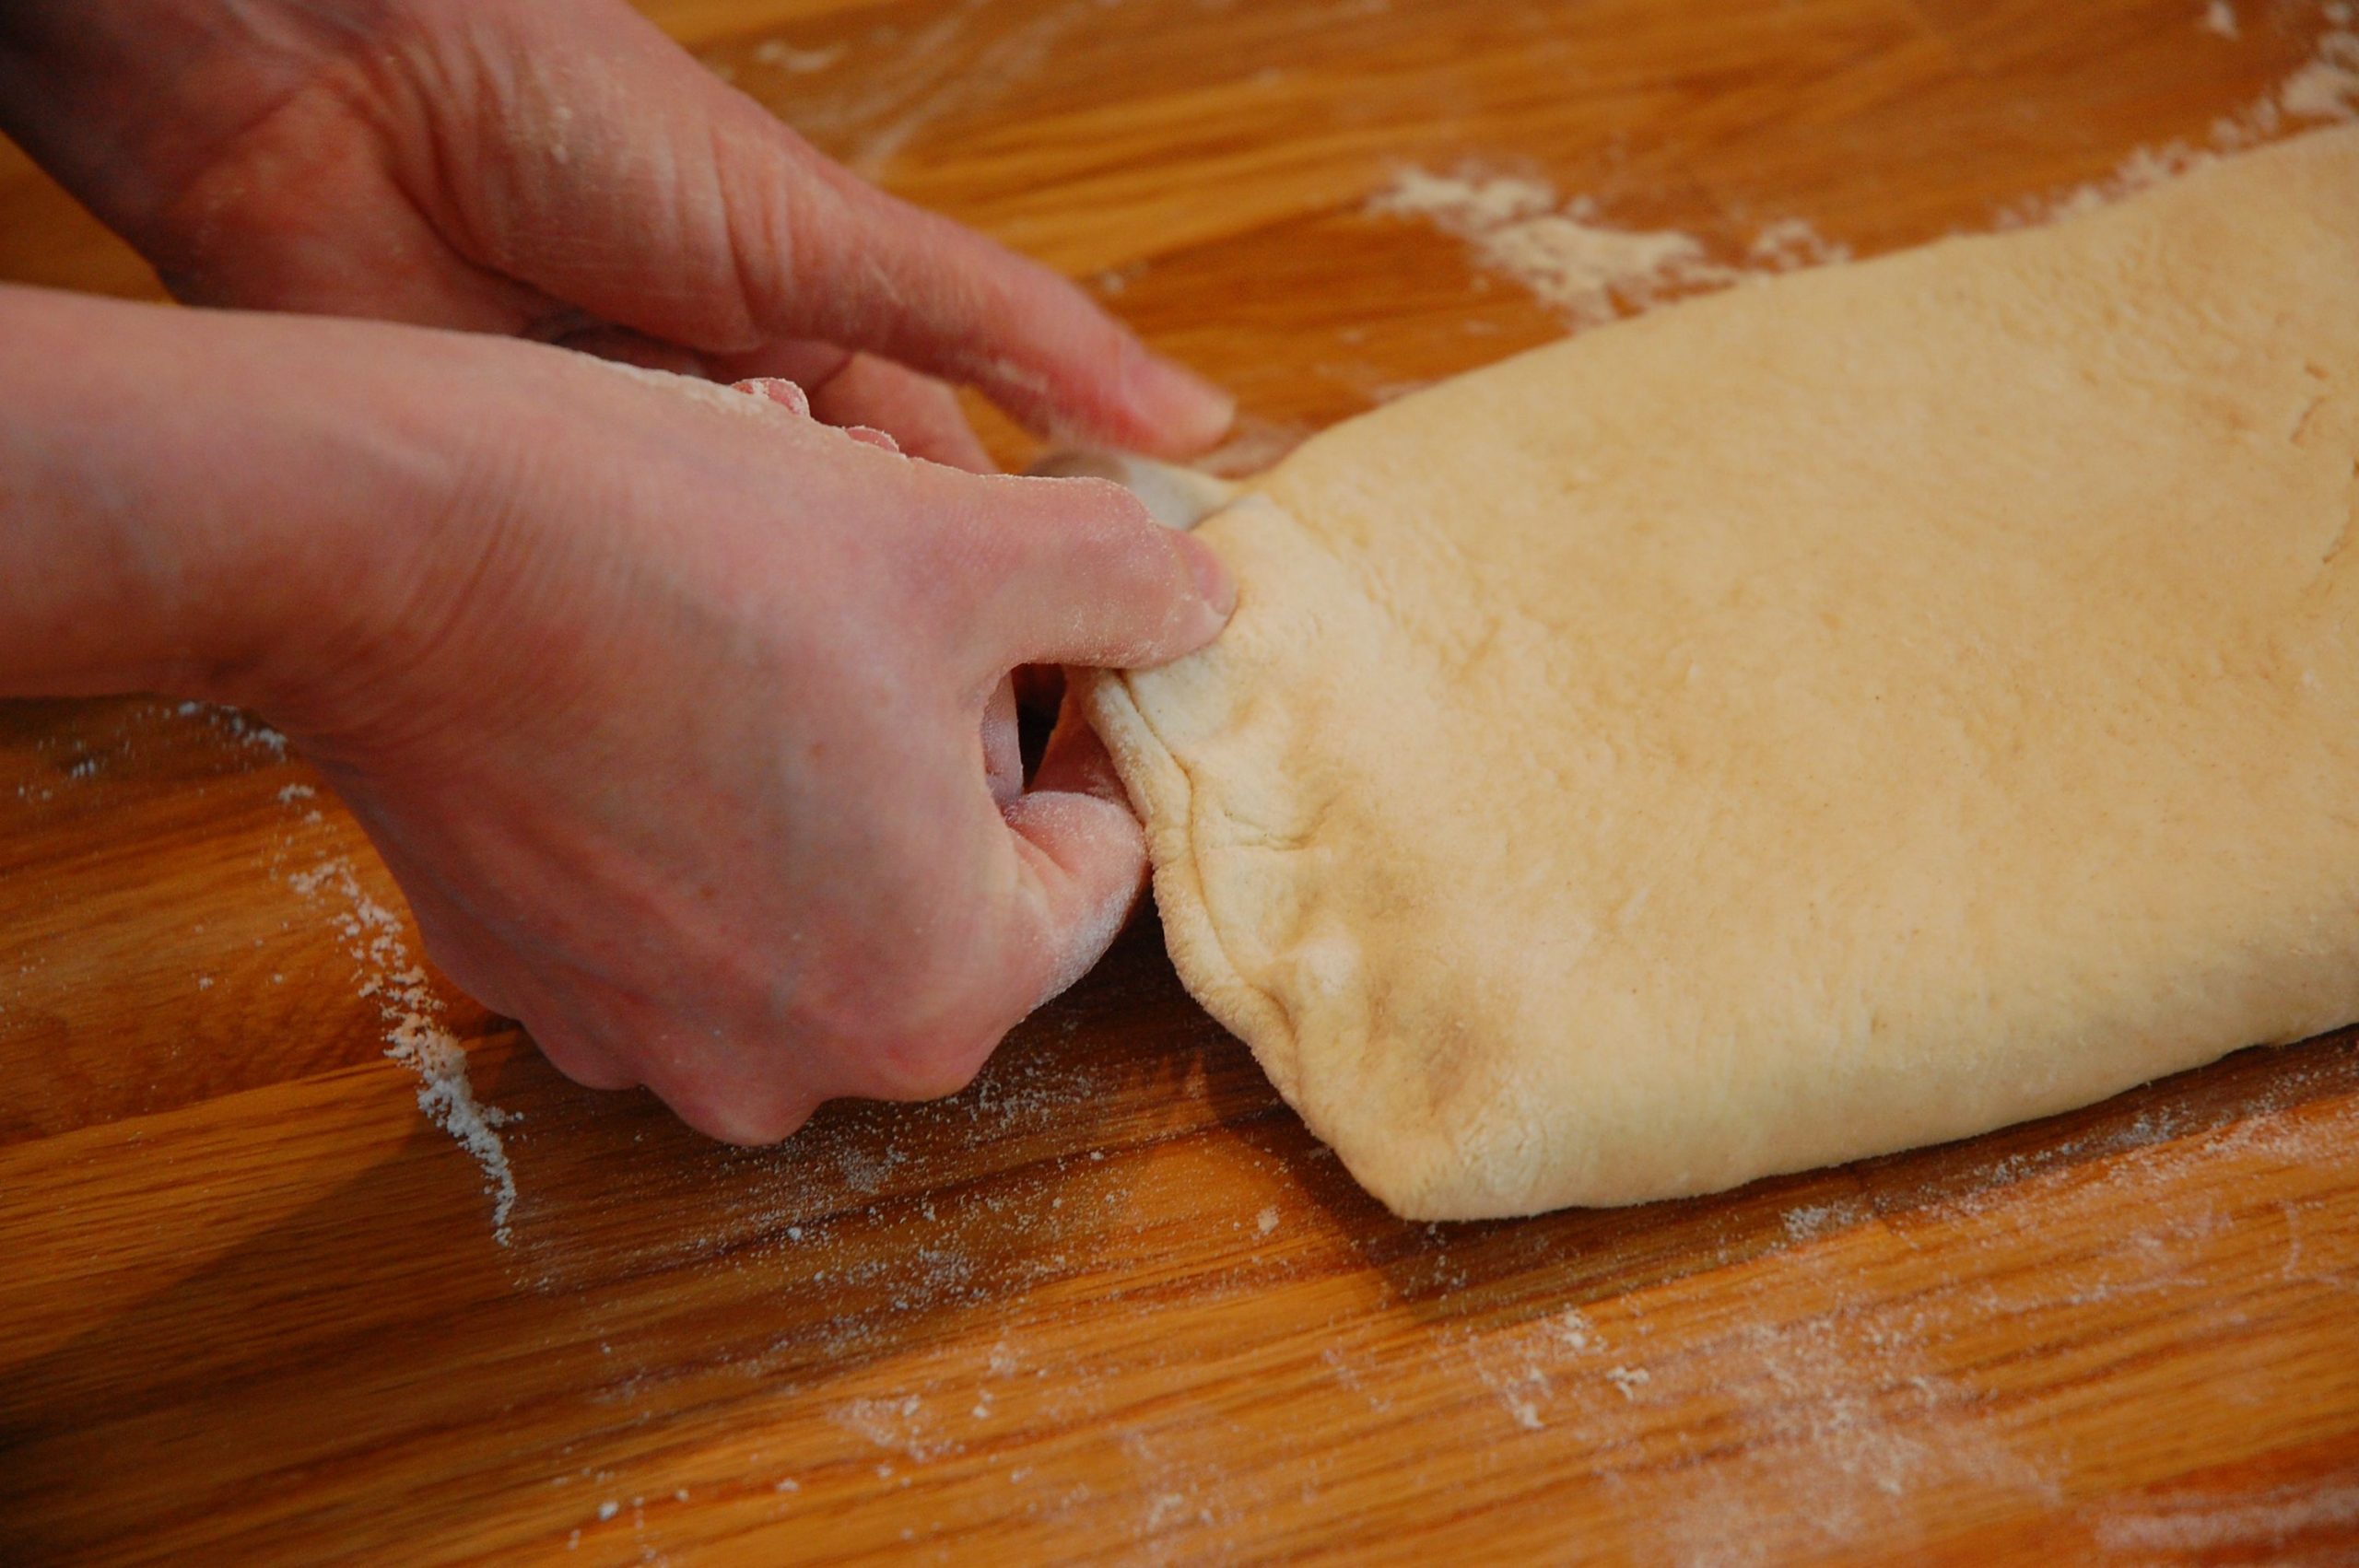
Fold the left-hand unbuttered piece of dough over the middle-third, buttered part: then fold the remaining buttered part over the top of these.
Pinch the edges together to seal the flattened piece of dough, and put it in the refrigerator (or a very cool larder if you’re lucky enough to have one) for about half an hour.
After this, lightly flour your work surface again and roll the dough out to approximately the same size of rectangle that you had the last time. Once more, take a third of the butter and lard mixture and repeat the process of spreading the right-hand two thirds of the dough with it. Then repeat the folding process: left-hand third folded down onto the middle part of the rectangle, and the right-hand remainder over the top of these, Once more seal the edges of the dough and put it back in the fridge to rest and cool again.
Repeat the above procedure one more time, and again put the folded dough into the fridge to rest and chill.
When the final half hour of chilling is done, once more lightly flour the work surface and roll the dough out into a rectangle again, about 1/2 inch thick. Use a very sharp knife to cut the dough into squares about 4″ / 10cm across.

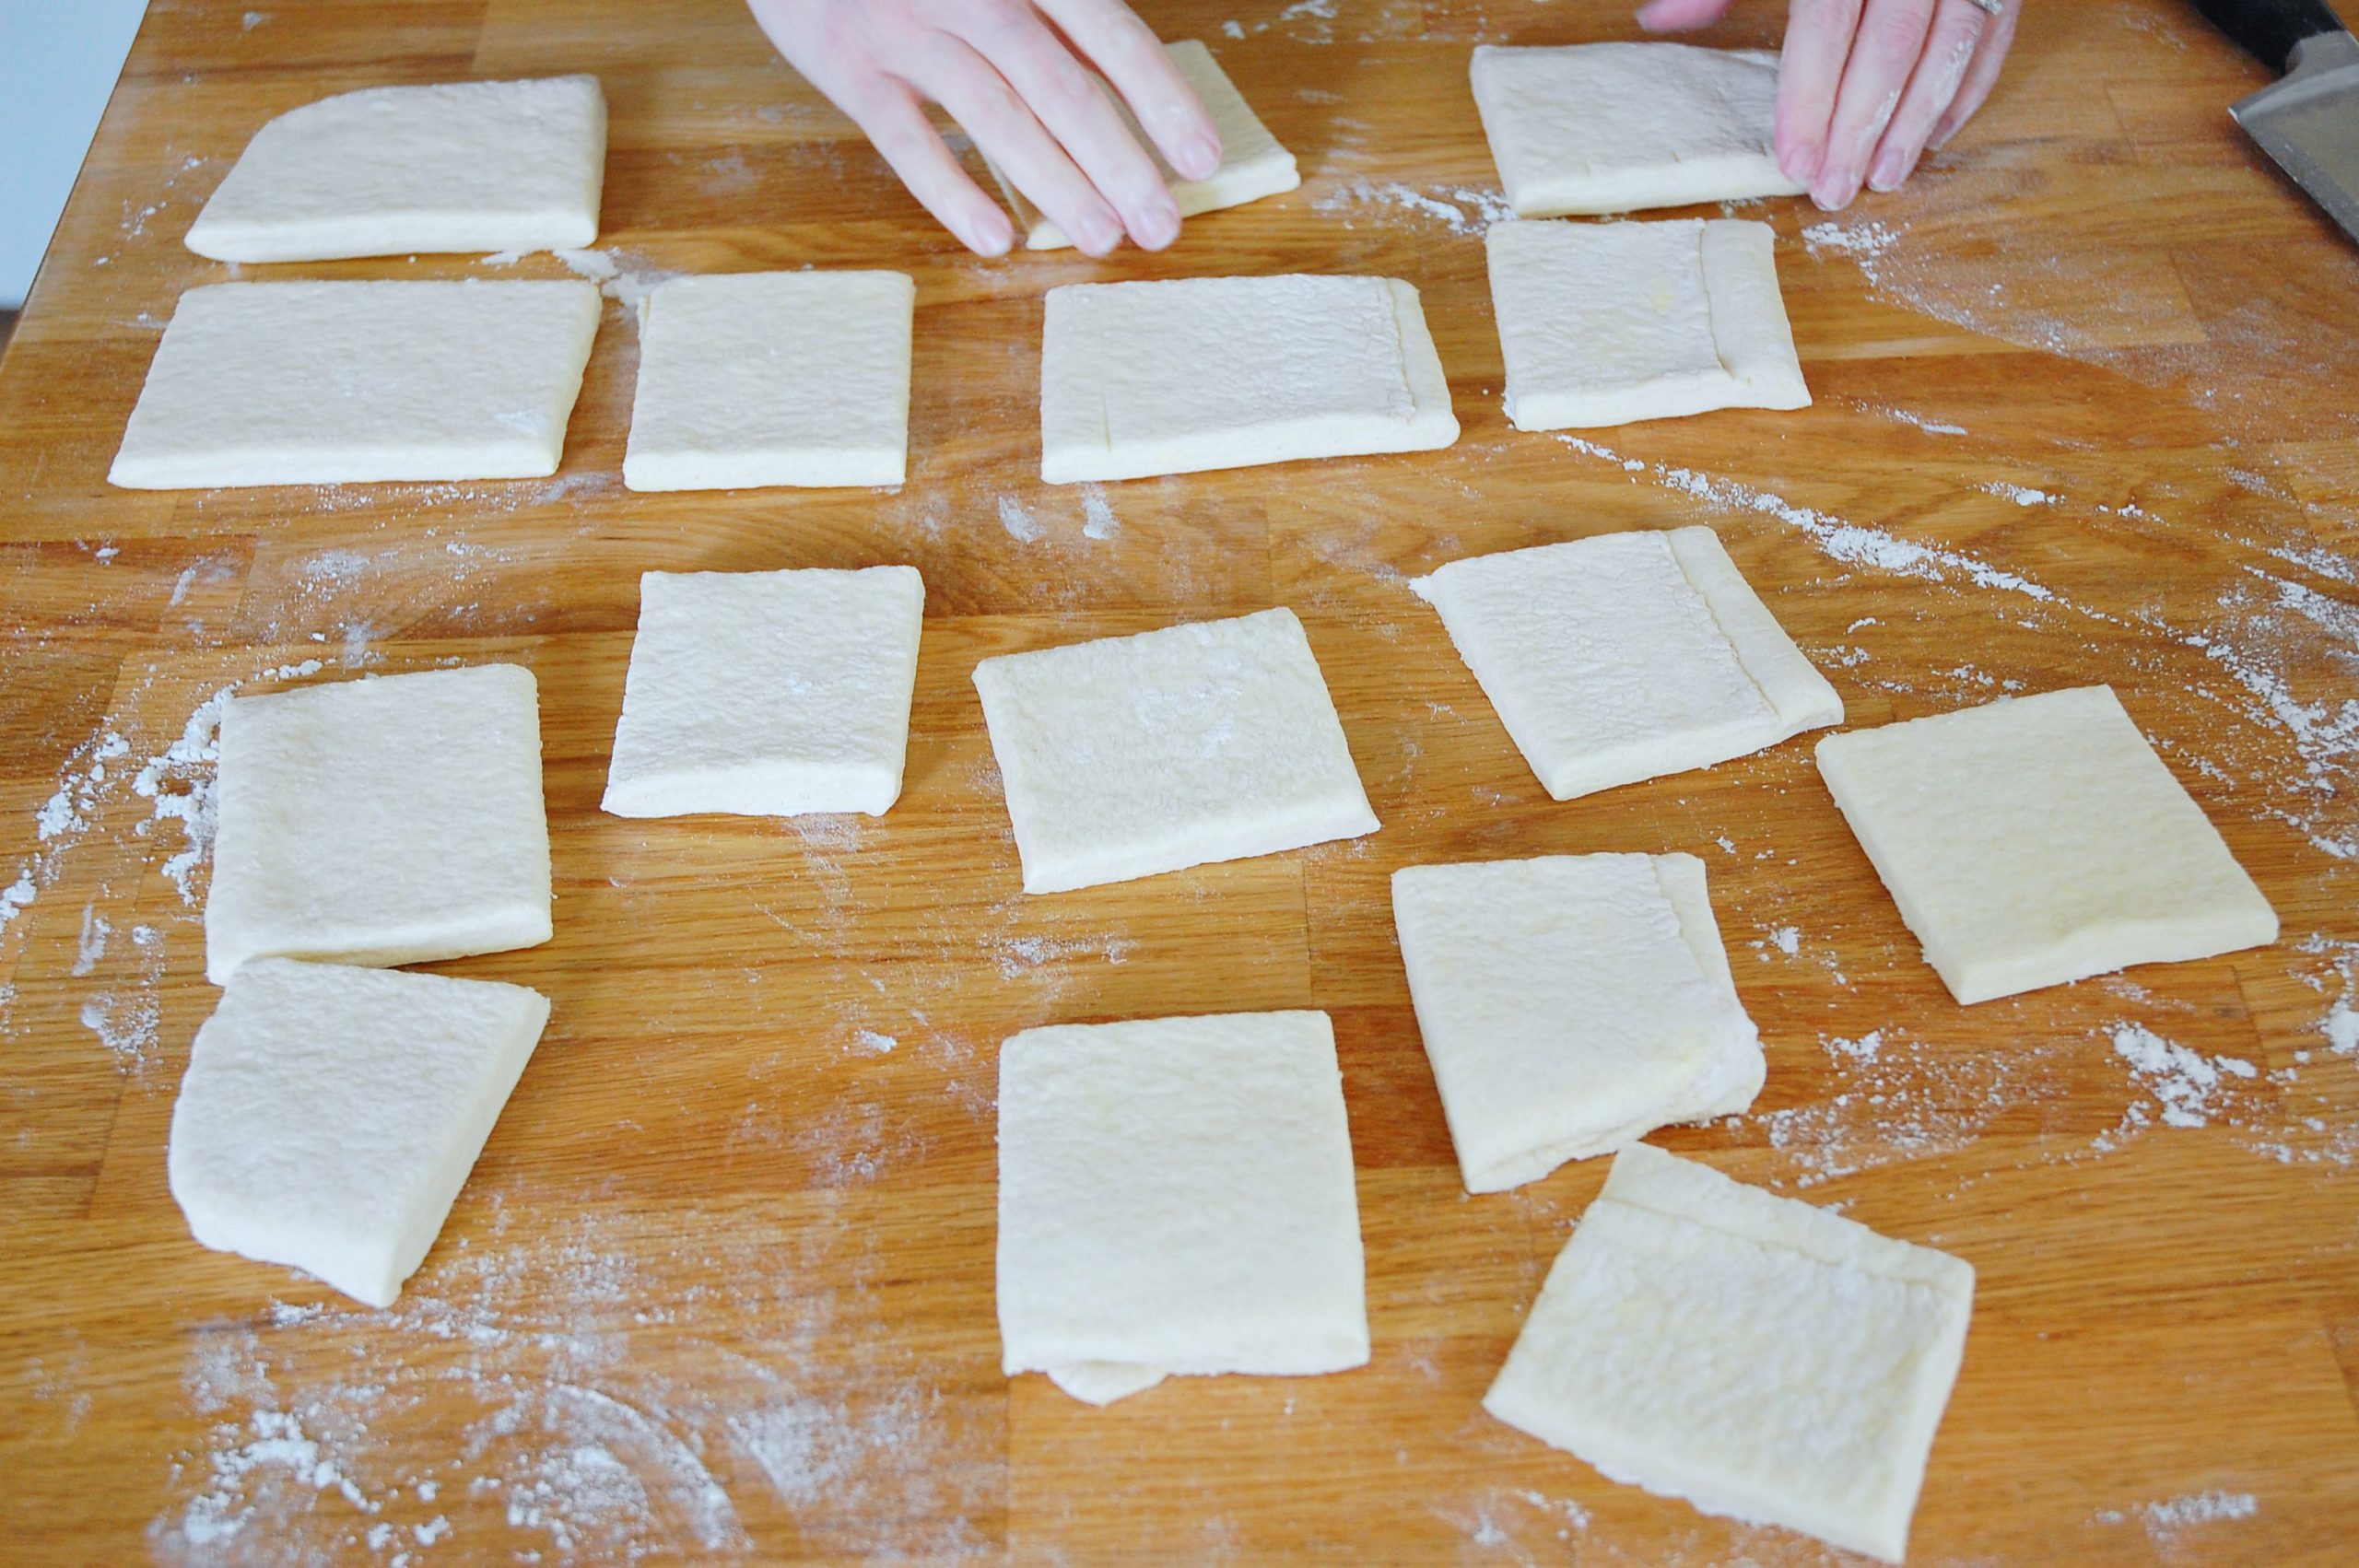
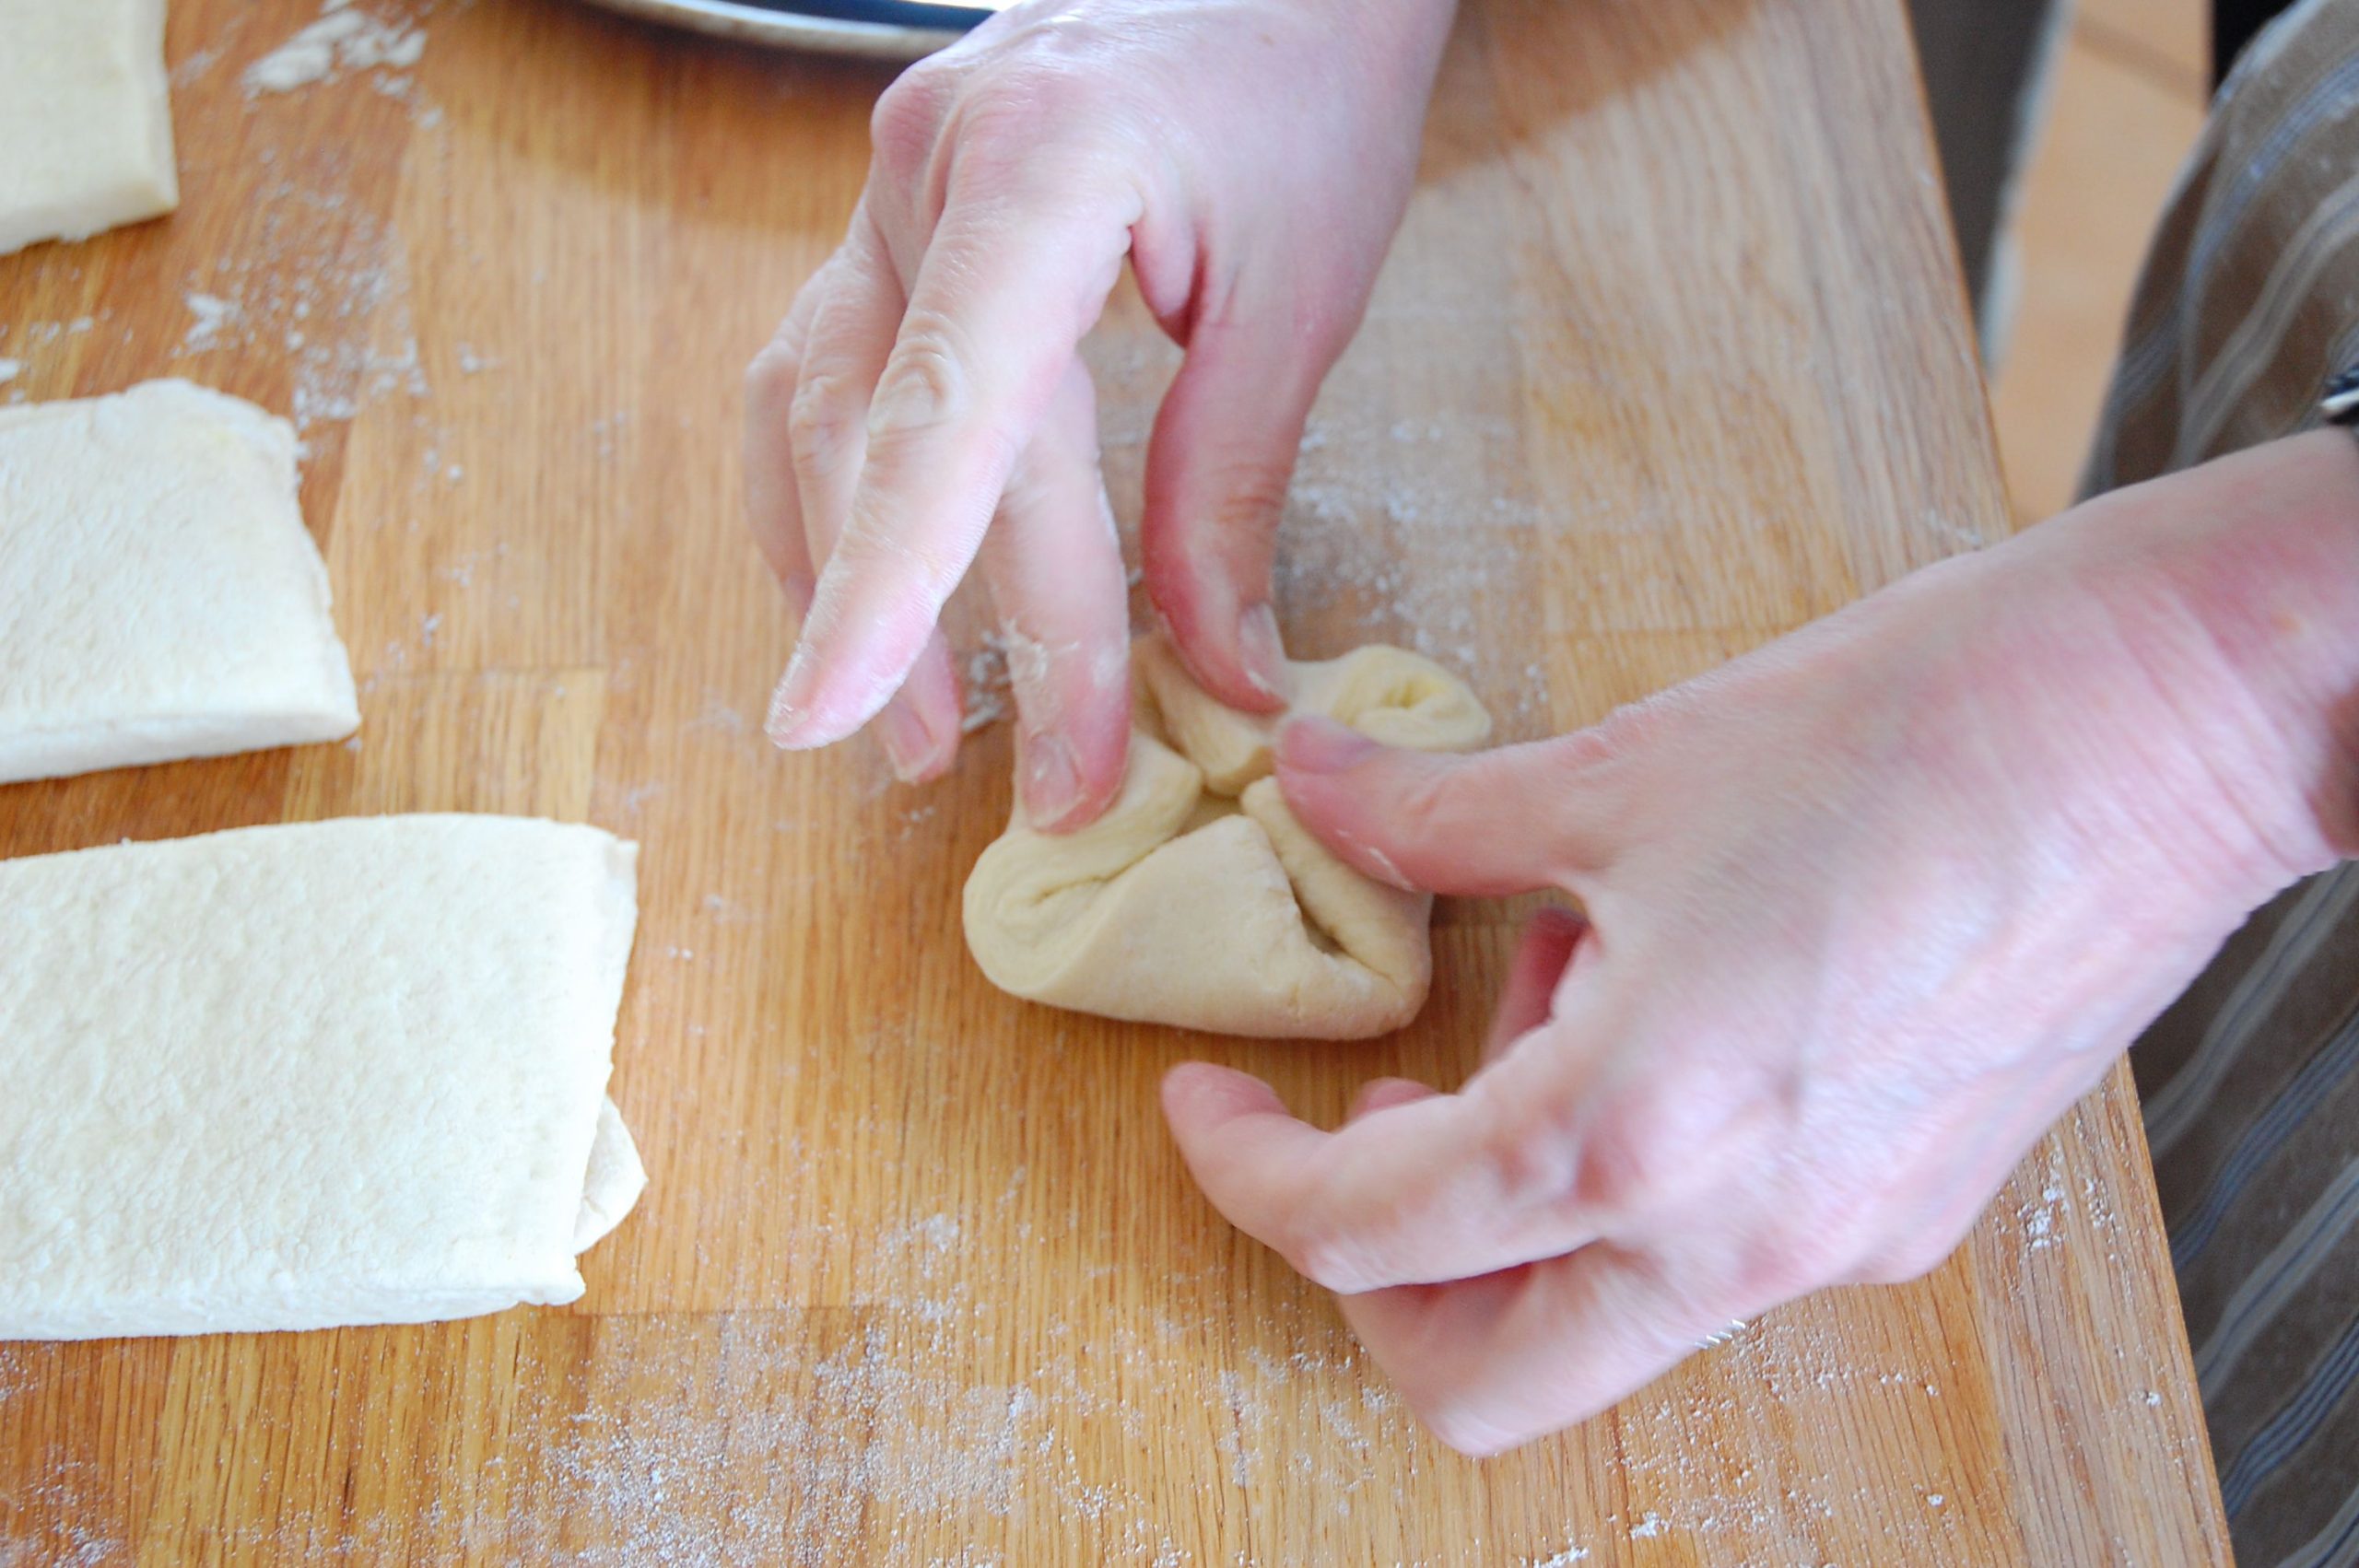
Have ready greased and floured baking sheets (or baking sheets with a good nonstick coating) and place the cut squares on them, first turning their corners under so as to turn them into oblongs or rounds.

Cover these with a non-fuzzy dishtowel or tea cloth and allow to rest and rise for another 45 minutes.
When about 15 minutes of rising time remains, preheat your oven to 200C / 400F. When the rising time is done, put the rowies in the oven and bake for 15-20 minutes or until golden brown. (Or until “crisp and flaky”, as Grigson says.) Be warned: the rowies will give up a fair amount of melted butter/lard as they bake. This is normal.
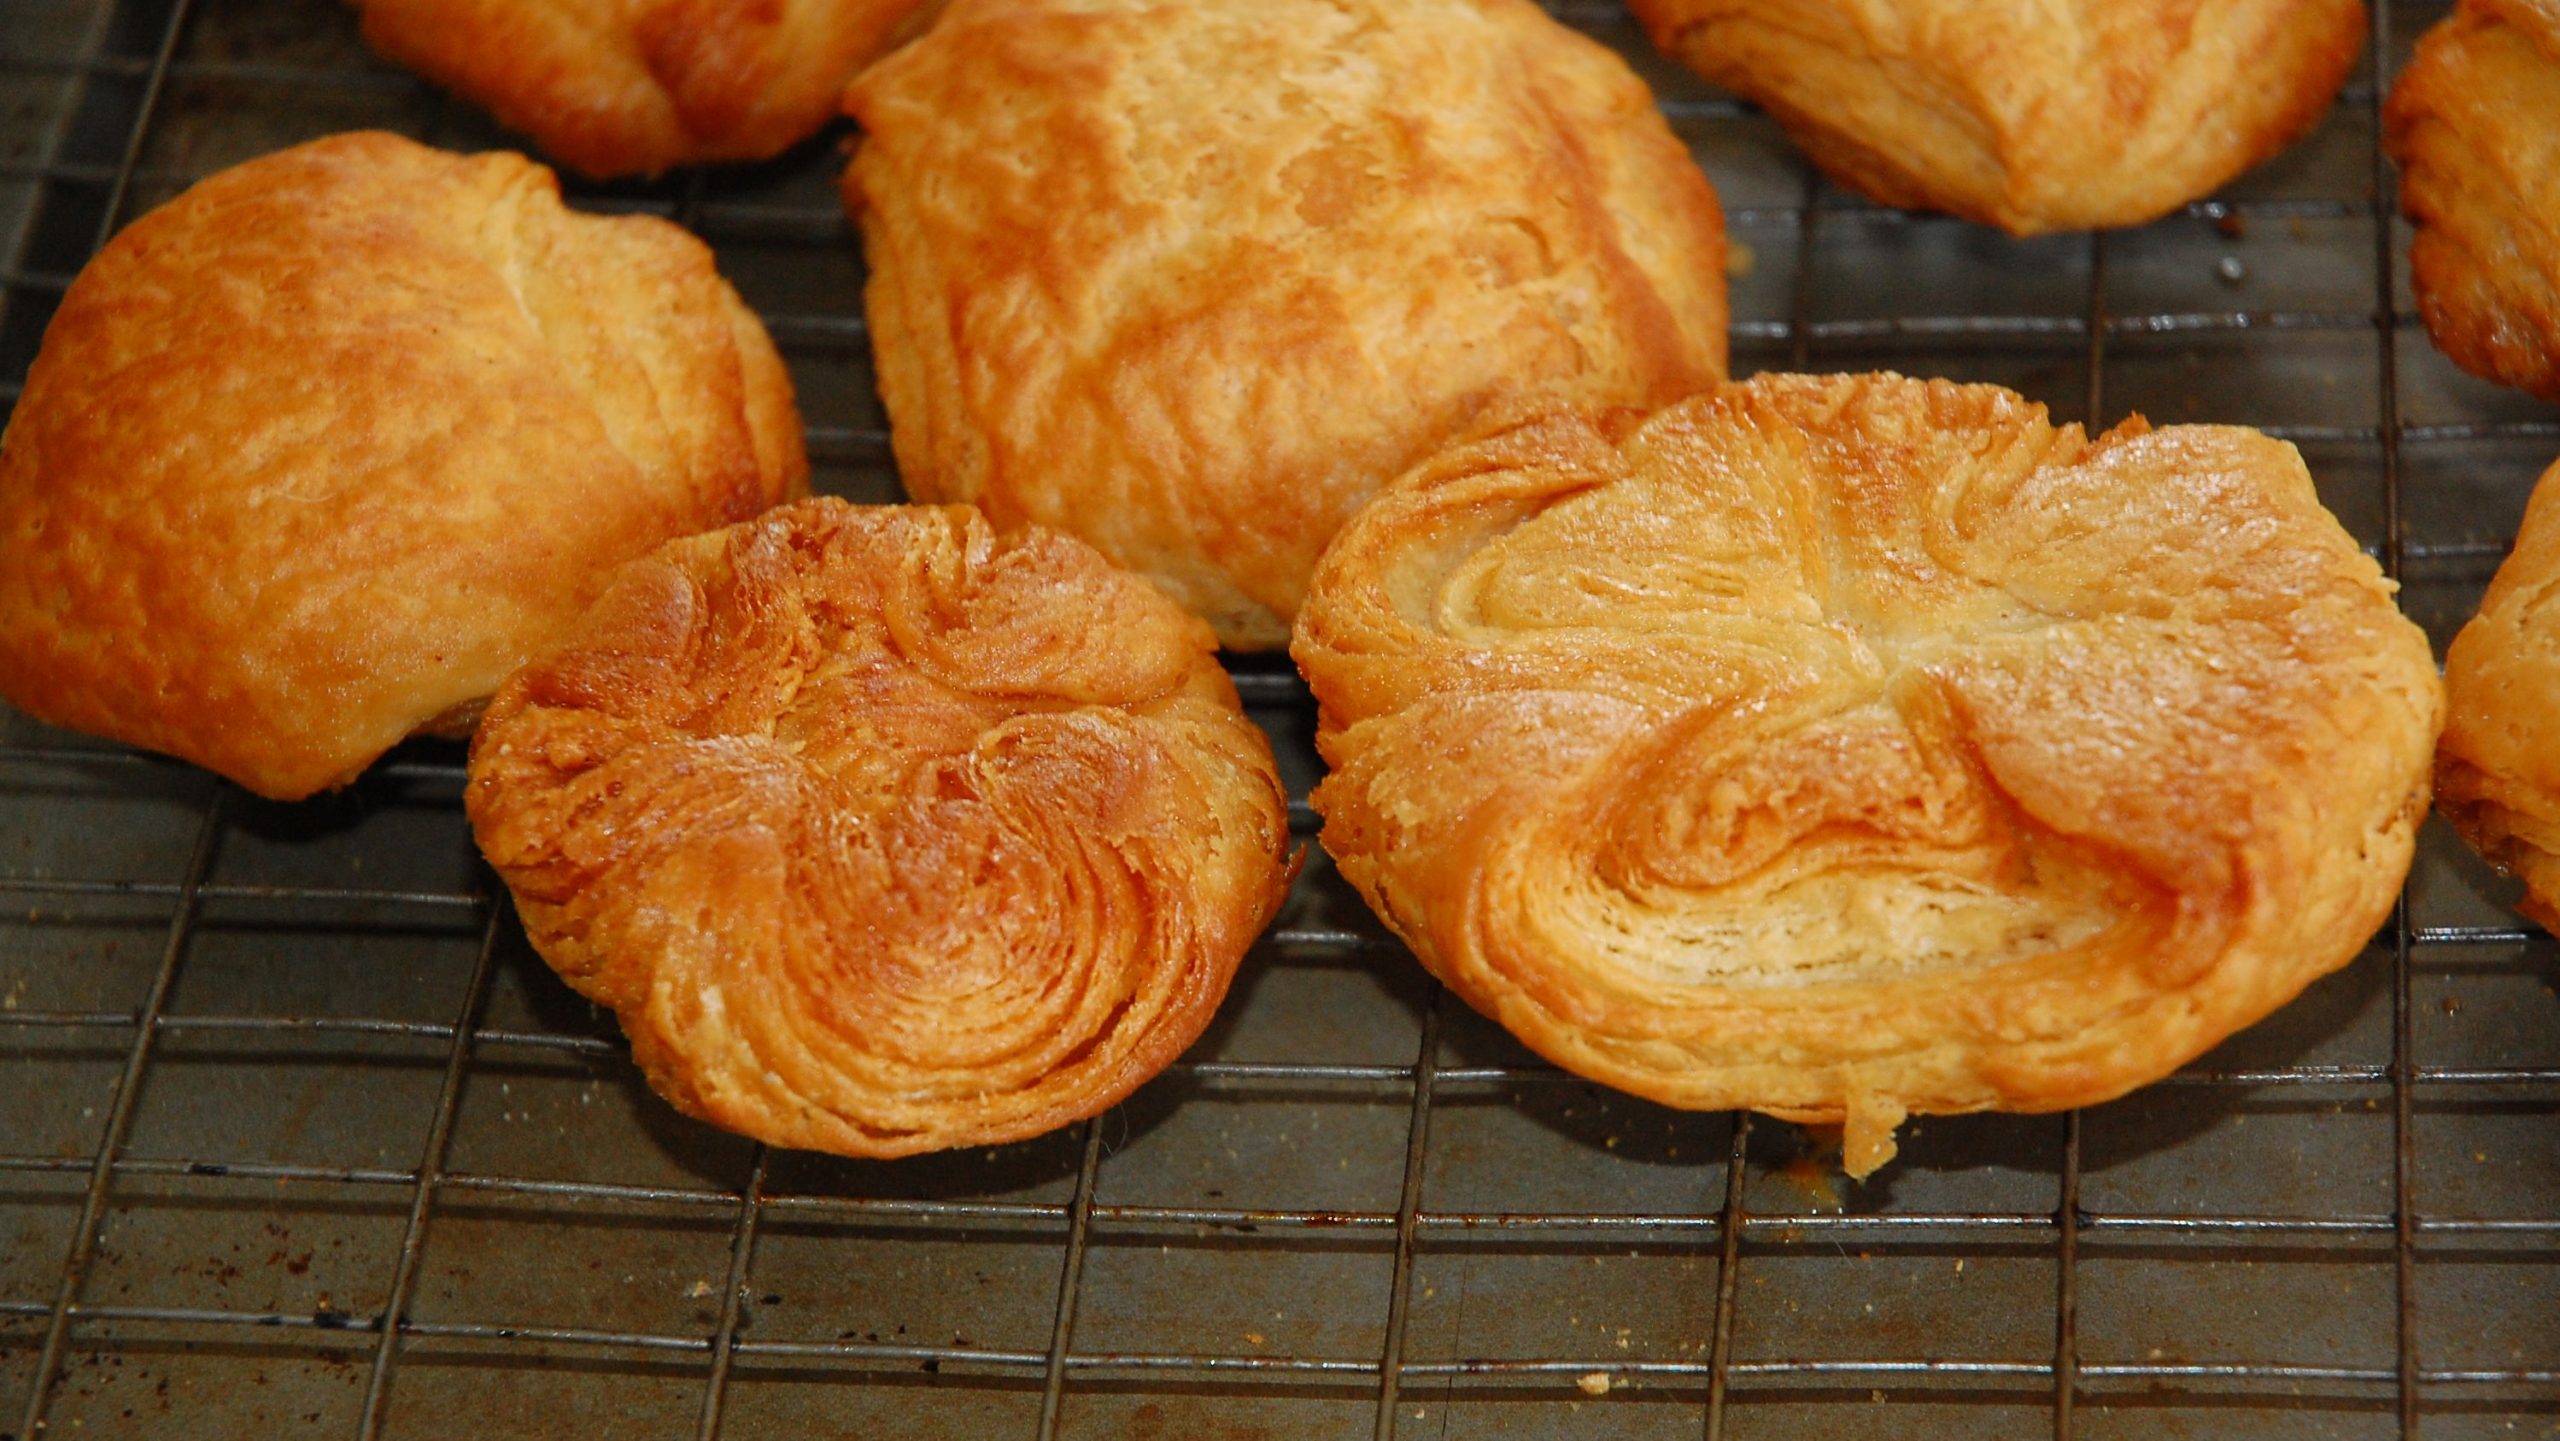
When they’re done, remove the rowies from the oven and place on a rack to cool. It’s wise to put something absorptive underneath them, as they may drip a little more butter/lard on the surface underneath as they finish cooling.

Serve the rowies warm with jam or marmalade. These can be kept at room temperature in a sealed container for a few days, but if you’re not going to eat them by them, it makes more sense to freeze them immediately and then reheat them when you’re ready for them. About 10 minutes at 375F / 175C should do nicely for this, though naturally you’ll know your own oven best and will know whether more or less time is required.
Enjoy!